|
The Processor (CPU)
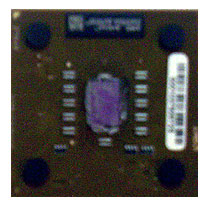
The Processor is also called the microprocessor or CPU. This is the most important tight fit on the motherboard. First you need to decide the brand and power you want to go for. You need to make this decision proper because a mistake here would ruin your experience with your PC. The CPUs you are most likely to go for would either be an Intel or an AMD. You might also go for a Cyrix or something else. If you will run Windows XP on your PC you should have a minimum of 233 MHz Pentium or higher microprocessor or equivalent. Ideally to deal with today’s high end applications you should have at least a gigahertz (GHz) or maybe a little less. In this walkthrough we sample an AMD Athlon XP 2000+ 1659 MHz.
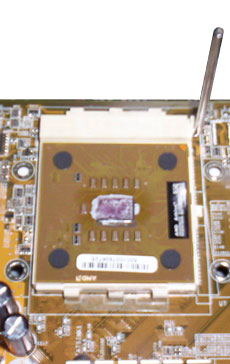
Your CPU must have come in a tight package along with a cooling fan thrown in. Unpack the CPU and the fan. Place your motherboard flat on top of the anti-static bag it came in.
The CPU should move into the socket with very little effort. If the CPU does not sit evenly on the socket never force it. Remove it completely and try again after ensuring you are doing it the right way. Ensure that the CPU is sitting flush with the socket on all sides. No pins should be visible. Once you are sure the CPU is correctly seated in the socket, lower the CPU-socket lever until it locks. This may require some little force. |